diy

A few lovely jar links


I absolutely jars. They make anything simply better! The best part is they are affordable & there are so many things that can be done with them. Here are a few links that I've kept my eye on & hope to eventually do. Please share if you have some too!

#1. Sweet fabric lite jars.
#2. Handy super dandy mason matches.
#3. All in one sewing kit.
#4. Pumping soap in a jar.
#5. Simple melted jar candles.
#6. Glittered bottoms.
#7. Organize your herbs dis way.
#8. Explosive smores cake.
#9. Sippin your jar.

Cheers!
 Instagram & RSS

A knotty Valentines day card


I'm aware Valentines day is a month away but I just cant help & get a head start. Especially when I figured out a way to incorporate this save the date card that I've been eying. The timing couldn't have been more perfect. This would even be perfect as an anniversary card! Anything romantic really.


Supplies

1. My PDF printable 
2. Scissors 
3. 9 inches of twine 
4. Exacto or cutting tool
5. Glue stick
5. 15 minutes of your time


Step one: After cutting out the PDF and carefully folding it in half, make a hole through the two sheets using your cutting tool. After doing so glue the two sheets together.


Step two: Place the twine through and make a knot. 


Step three: Before doing the same to the other side, make a loose knot in the middle of the card.


Make sure when you give your card to your valentine that the knot in the middle is loose. That way when they open it up it will form the knot. Click on the download bar below to make your own!


Cheers!
 Instagram & RSS


D.i.y Balloon on a stick


I've never really cared for those tiny silver balloon sticks that you buy at the market. Its probably because I like the way plastic balloons look. So I thought I would do a mixture of those balloons topped off with some ribbon. While shopping for balloons I ran into these fun smiley faced ones that I imagined would work perfectly for a birthday or to simply cheer someone up. So I grabbed a pack and got to work. Im warning you right now, this not the last time you'll be seeing these. My mind is overflowing with ideas on the different combinations that can be done.

Supplies

#1. Balloon
#2. Dowel 
#3. Two to three ribbons to mix and max
#4. Fifteen minutes of your time


Step one: Blow your balloon & knot it up!


Step two: Pick your ribbon! I stuck with a two color combo and made them long enough so that I could make a knot with the middle, rather than the ends.


Step three: In order to gain control of my balloon, I decided to tape it to the dowel. Don't worry it'll be covered once you add the ribbon around it.


Step four: Tie the ribbon tight so that the balloon stand up nice & tall. I absolutely loved the way it looked once it was done, it was fun and definitely a quick surprise to give to a friend. 


Cheers!
 Instagram & RSS


Friday Fingers // Gold leaf nails


I absolutely love gold leaf. It turns anything and everything fancy & shiny! But lately I've been curious to use it on my nails. Turns out it is one of the easiest manicure's I have encountered. Add this to your lazy lady's guide of fast & fancy manicures because those gold sheets will last you forever. The best part is all the color combinations you could do. For New Year's sake I did Black & Gold but I will def. try some rose gold!

Supplies

#1. Gold leaf. 
You could purchase this from any craft store or online.
#2. Black nail polish
#3. Top coat
#4. 30 mins of your time


Step one: Paint your nails black, or any color that will let the gold pop!


Step two: Now is the time to add the gold leaf. Make sure your nails are dry, but in that stage where its still kind of sticky. I recommend lightly touching your pinky nail for this. Then dab the sheet over your nail. Do this until you get the desired pattern.


Step three: Add top coat & your done!


Cheers!


D.i.y Felt Gift Bow


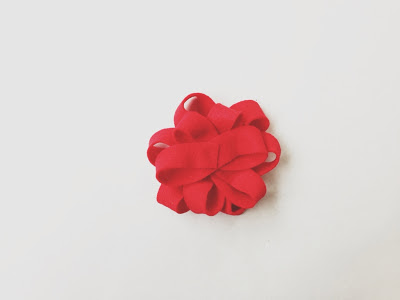
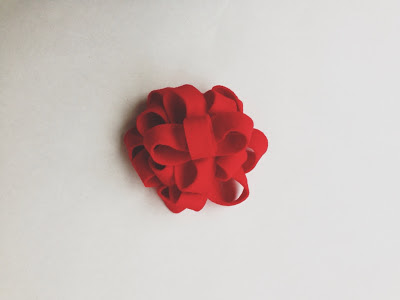
Happy christmas eve! Can not believe christmas is almost over. To be honest it didn't really feel too christmasy this year, I know school had a lot to do with that as well as running around all the time. So to save time I thought I would make gift wrapping easy with these felt gift bows. They are a perfect way to top any small package. But I must say my favorite is wrapping one around a wine, and the best part is you can use these all year round. I make enough to save me throughout the whole year. That way when a birthday or special event comes up and I have nothing to give, I grab me one of these, head to the market & done. Oh and they are totally reusable!


Supplies

#1. Glue gun
#2. Glue sticks 
#3. Scissors
#4. Ruler 
#5. Felt
#6. 20 mins of your time


Step one: Choose the type of felt you'd like to use.


Step two: Use these measurements for length and width.  I was to lazy to cut each strip so I just guesstimated.


Step three: Glue each strip into criss cross ribbons (similar to breast cancer awareness ones).
& leave that little piece shown below alone. You'll use it later.


Step four: Pile longest ribbons on the bottom (3 of them) and so on. 
3 strips, 10 1/2" x 3/4"
3 strips, 9 1/2" x 3/4"
2 strips, 8 1/2" x 3/4"
1 strip, 3 1/2" x 3/4" 


Step five: Now its time to use that small strip and form a circle. This will go on the top of the pile of ribbons.


I made a burgundy one as well!


I also decided to add elastic to tie around a bottle of wine for a quick gift wrap!


Just hot glue the elastic to the bottom of the bow, then glue a piece of felt to secure it. 


Or turn it into a pin! Perfect for holiday parties or simply to be festive.


Cheers!
 Instagram & RSS


Related Posts Plugin for WordPress, Blogger...
Back to Top
Pin It button on image hover