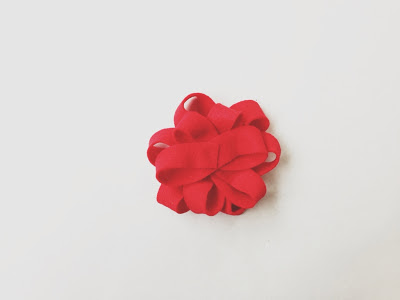
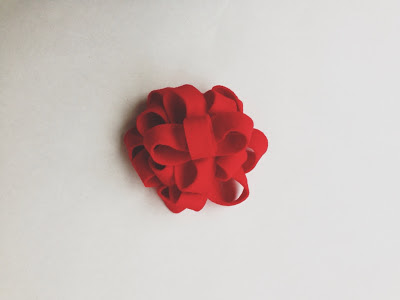
D.i.y Balloon on a stick


I've never really cared for those tiny silver balloon sticks that you buy at the market. Its probably because I like the way plastic balloons look. So I thought I would do a mixture of those balloons topped off with some ribbon. While shopping for balloons I ran into these fun smiley faced ones that I imagined would work perfectly for a birthday or to simply cheer someone up. So I grabbed a pack and got to work. Im warning you right now, this not the last time you'll be seeing these. My mind is overflowing with ideas on the different combinations that can be done.

Supplies

#1. Balloon
#2. Dowel 
#3. Two to three ribbons to mix and max
#4. Fifteen minutes of your time


Step one: Blow your balloon & knot it up!


Step two: Pick your ribbon! I stuck with a two color combo and made them long enough so that I could make a knot with the middle, rather than the ends.


Step three: In order to gain control of my balloon, I decided to tape it to the dowel. Don't worry it'll be covered once you add the ribbon around it.


Step four: Tie the ribbon tight so that the balloon stand up nice & tall. I absolutely loved the way it looked once it was done, it was fun and definitely a quick surprise to give to a friend. 


Cheers!
 Instagram & RSS


A free weekly printable plan!


Hello all & Happy new year! Sorry for my absence this week, I was in the beautiful San Francisco helping my best friend move. Some of you already knew that, via instagram. Any who I hope all of your festivities were fantastic! As for me its time to start the year off productively. I decided to try something new this year. I have no idea why but every year when I start a new planner I quit half way, seriously it never fails. This year to avoid that, I'm going to print out a months worth of my weekly planner pages. Im hoping it will motivate me to accomplish more of my bucketlist items. Last year I started a five year bucketlist & have accomplished 7 of 30. Nothing crazy, but its something. I figured if I gave myself a reasonable time frame I would get more done and be motivated, rather than making it a list before I die. Below is a download to my pdf that I hope you will all enjoy! & down lower is a list of my completed goals as well as those I hope to knock out!


Read More >>

Friday Fingers // Gold leaf nails


I absolutely love gold leaf. It turns anything and everything fancy & shiny! But lately I've been curious to use it on my nails. Turns out it is one of the easiest manicure's I have encountered. Add this to your lazy lady's guide of fast & fancy manicures because those gold sheets will last you forever. The best part is all the color combinations you could do. For New Year's sake I did Black & Gold but I will def. try some rose gold!

Supplies

#1. Gold leaf. 
You could purchase this from any craft store or online.
#2. Black nail polish
#3. Top coat
#4. 30 mins of your time


Step one: Paint your nails black, or any color that will let the gold pop!


Step two: Now is the time to add the gold leaf. Make sure your nails are dry, but in that stage where its still kind of sticky. I recommend lightly touching your pinky nail for this. Then dab the sheet over your nail. Do this until you get the desired pattern.


Step three: Add top coat & your done!


Cheers!


A few lovely 2013 printable calendars


The new year is approaching and theres nothing I love more than calendars. Wait let me rephrase that, FREE calendars. Something about them just make me feel instantly prepared and organized. Here I've gathered six of my favorite calendars, one of which will organize all those birthdays, and some that are totally giftable. Enjoy!


(Links are down low)

#1. A splendid geometric way to view 2013.
#2. This ones aztecular!
#3 Have yourself a sweet year.
#4. Choose me for an inspirational year!
#5. Year round chalkboard calendar.
#6. Get your birthdays straight.


Cheers!
 Instagram & RSS


D.i.y Felt Gift Bow


Happy christmas eve! Can not believe christmas is almost over. To be honest it didn't really feel too christmasy this year, I know school had a lot to do with that as well as running around all the time. So to save time I thought I would make gift wrapping easy with these felt gift bows. They are a perfect way to top any small package. But I must say my favorite is wrapping one around a wine, and the best part is you can use these all year round. I make enough to save me throughout the whole year. That way when a birthday or special event comes up and I have nothing to give, I grab me one of these, head to the market & done. Oh and they are totally reusable!


Supplies

#1. Glue gun
#2. Glue sticks 
#3. Scissors
#4. Ruler 
#5. Felt
#6. 20 mins of your time


Step one: Choose the type of felt you'd like to use.


Step two: Use these measurements for length and width.  I was to lazy to cut each strip so I just guesstimated.


Step three: Glue each strip into criss cross ribbons (similar to breast cancer awareness ones).
& leave that little piece shown below alone. You'll use it later.


Step four: Pile longest ribbons on the bottom (3 of them) and so on. 
3 strips, 10 1/2" x 3/4"
3 strips, 9 1/2" x 3/4"
2 strips, 8 1/2" x 3/4"
1 strip, 3 1/2" x 3/4" 


Step five: Now its time to use that small strip and form a circle. This will go on the top of the pile of ribbons.


I made a burgundy one as well!


I also decided to add elastic to tie around a bottle of wine for a quick gift wrap!


Just hot glue the elastic to the bottom of the bow, then glue a piece of felt to secure it. 


Or turn it into a pin! Perfect for holiday parties or simply to be festive.


Cheers!
 Instagram & RSS


Friday fingers /// Ikat nails


These past two weeks have been more hectic than usual. I've been dealing with grad school applications, which is really killing my printer. But its been both exciting and nerve wrecking. All I can say is, I can't wait for it to be over and done with! Today seriously better not be the end for us because my work needs to pay off. Anyways believe it or not stress leads me to painting my nails, and this week I feeling a bit katty (Ikat to be exact). I've done this tutorial before but my instructions weren't just right so redoing it was a must. 

Materials

#1. Teal nail polish
#2. Bright orange striper brush
#3. White nail art pen
#4. Black nail art pen
#5. Top coat
#6. 25 mins of your time


Step one: Paint your nails with your teal polish. Then let it dry.


Step two: Paint some chunky splotchy dots with your orange striper brush.


Step three: Once your orange droplets are dry, top them with some white polish. To be honest, I even love the way this pattern looks. Simple but vibrant!


Step four: Add a black dot to each of your dots. They should look like eyeballs at this point. Remember to make sure your polish is dry as you take the next step.


Step five: This is the tricky part. With your black nail art polish you will now outline your orange eye pattern. Now when you do this you will make a jagged like pattern around it. Perfection is not the key here. Lastly top coat them up & done!


 Cheers!

 Instagram & RSS


Related Posts Plugin for WordPress, Blogger...
Back to Top
Pin It button on image hover