I don't think I'll ever get tired of polka dots. They're so simple and harmless, how could anybody not be pro polka. They are my go to when I'm in a hurry, just so they're not too bare. Last week I ordered some black fuzzzz, but I'm still searching for dark crushed velvets just because they're easier to maintain. My top searches are navy and dark burgundy. I can just imagine how rad they'd look. But for now I'll be having fun with what I got & i'll be sharing with some of you! Down low is a giveaway for two winners to get some fuzz as well as a chance to become a free sponsor for 2 months!
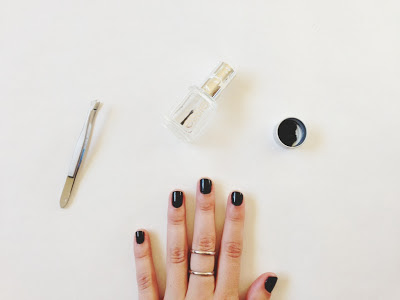
Supplies

#1. Black nail polish
#2. Top coat
#3. Tweezers
#4. Black crushed velvet
#5. 30 mins of your time
Step one: Paint your nails black, then apply top your top coat.
Step two: Make sure that your nails are 100% dry in order to continue onto this step. If so get your tweezers, top coat, and fuzz ready. Pour some onto a surface or small container.
Step three: Add a nice round drop of top coat onto your already coated nails. From here on your going to have to work semi fast, just so that fuzz'll stick nice and smooth. Once you apply the droplet, grab your tweezers and pick some fuzz up to apply onto your nail. Once the fuzz is on top, gentle dab it down, let it sit for 10 seconds or so. Then you can blow the residual fuzz off.
You can either do one droplet at a time (Which is what I did for the first 4 nails or so) or if your confident enough you can apply all the droplets you want onto one nail. Then follow the same process of gentle dabbing.
I decided to go bigger with my polkas then I usually do, just because it would make the fuzz more apparent but I also mixed and matched (Added some small fuzzy balls on there). I'm really glad with the way they came out, but I've never realized how pale winter has left me! I'm going to have to cook out in the sun one of these days, Im as tan as a new born.
Enter the raffle below to get your own set of fuzz as well as two months of free sponsor space located on the right. Happy friday!
Cheers!


