tutorial

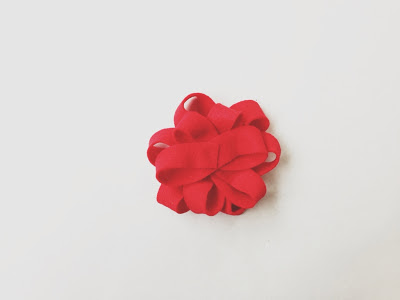
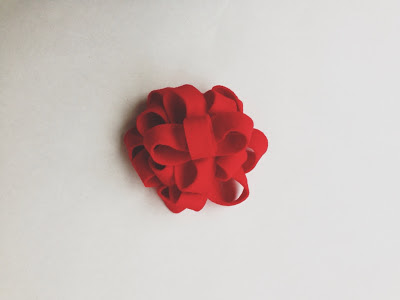
D.i.y Felt Gift Bow


Happy christmas eve! Can not believe christmas is almost over. To be honest it didn't really feel too christmasy this year, I know school had a lot to do with that as well as running around all the time. So to save time I thought I would make gift wrapping easy with these felt gift bows. They are a perfect way to top any small package. But I must say my favorite is wrapping one around a wine, and the best part is you can use these all year round. I make enough to save me throughout the whole year. That way when a birthday or special event comes up and I have nothing to give, I grab me one of these, head to the market & done. Oh and they are totally reusable!


Supplies

#1. Glue gun
#2. Glue sticks 
#3. Scissors
#4. Ruler 
#5. Felt
#6. 20 mins of your time


Step one: Choose the type of felt you'd like to use.


Step two: Use these measurements for length and width.  I was to lazy to cut each strip so I just guesstimated.


Step three: Glue each strip into criss cross ribbons (similar to breast cancer awareness ones).
& leave that little piece shown below alone. You'll use it later.


Step four: Pile longest ribbons on the bottom (3 of them) and so on. 
3 strips, 10 1/2" x 3/4"
3 strips, 9 1/2" x 3/4"
2 strips, 8 1/2" x 3/4"
1 strip, 3 1/2" x 3/4" 


Step five: Now its time to use that small strip and form a circle. This will go on the top of the pile of ribbons.


I made a burgundy one as well!


I also decided to add elastic to tie around a bottle of wine for a quick gift wrap!


Just hot glue the elastic to the bottom of the bow, then glue a piece of felt to secure it. 


Or turn it into a pin! Perfect for holiday parties or simply to be festive.


Cheers!
 Instagram & RSS


Friday fingers /// Ikat nails


These past two weeks have been more hectic than usual. I've been dealing with grad school applications, which is really killing my printer. But its been both exciting and nerve wrecking. All I can say is, I can't wait for it to be over and done with! Today seriously better not be the end for us because my work needs to pay off. Anyways believe it or not stress leads me to painting my nails, and this week I feeling a bit katty (Ikat to be exact). I've done this tutorial before but my instructions weren't just right so redoing it was a must. 

Materials

#1. Teal nail polish
#2. Bright orange striper brush
#3. White nail art pen
#4. Black nail art pen
#5. Top coat
#6. 25 mins of your time


Step one: Paint your nails with your teal polish. Then let it dry.


Step two: Paint some chunky splotchy dots with your orange striper brush.


Step three: Once your orange droplets are dry, top them with some white polish. To be honest, I even love the way this pattern looks. Simple but vibrant!


Step four: Add a black dot to each of your dots. They should look like eyeballs at this point. Remember to make sure your polish is dry as you take the next step.


Step five: This is the tricky part. With your black nail art polish you will now outline your orange eye pattern. Now when you do this you will make a jagged like pattern around it. Perfection is not the key here. Lastly top coat them up & done!


 Cheers!

 Instagram & RSS


Friday fingers /// D.i.y finger fuzz


Friday is here & I couldn't be happier! The weather is finally acting its age.
Here in L.A. we'll be having a whole weekend of rain & that gets me all warm and fuzzy.
Which is why Im sharing my pink fuzzy nails today. These are my go to for a quick, fun, and 
easy manicure. You really hardly need anything for these pups! But I just want to warn
 you, they tend to get dirty pretty easily so beware. Sadly that means finger foods are a no no. 
Other than that, they are a blast to have and are totally unique!


Supplies:

#1. Pink velvet fuzz (crushed velvet)
You could either order it, or find it at Joann.

#2. Essie A Crewed Interest or a soft pink

#3. Tweezers


Step one: First things first, apply one coat of nail polish. Whats great
about this step is you can be as sloppy as you want since the
 pink fuzz will cover most of your errors!


Step two: This is were you'll work fast. Apply your second coat of nail polish.
Then with the tweezers apply the pink fuzz on top of the wet polish. Once
 your little pink fuzz of a mountain is sitting on top, your going to squash it 
down with your finger. Making sure you cover your whole nail.


Step three:  Once you finish, there will be alot of fuzz left over on your fingers.
To fix that your simply just going to blow it off till its nice and clean! Each and everyone of them.


& There you have it, a hand full of pink fuzzy nails!

Cheers!
Follow my blog with Bloglovin

D.I.Y Fabric notebooks


I dont know about you, but I've always had a love for school supplies. Doesnt matter the time of the year, a new notebook or set of new inky pens just makes me the happiest. But what to do with those old left over notebooks? The old ones that have lost its shine. Well, make them brand new again!


supplies:

#1. Old composition notebook


#2. Fabric. This is the perfect time to use any

left overs you have laying around

#3. Scissors


#4. Spray glue


Step one: Trim the side of the fabric you are going to use.


Step two: This is were things get messy. Spray the notebook with spray glue

but make sure you don't get it on the black portion of your notebook (black tape).
In other words only spray the pattern of the notebook.


Step three: Your going to want to work fast. Start by making sure the fabric is aligned

with the border of the notebook (black tape that holds it together). Then smooth out
the rest of the notebook, making sure all the wrinkles are pressed out.

Step four: Now that the fabric is attached to the notebook, its time to cut off the

fabric. What you need to do here is trace along the sides of the notebook.


Step five: Do the same to the other side. Wait for it to dry, and voila
you've got yourself a brand new notebook!

Cheers!


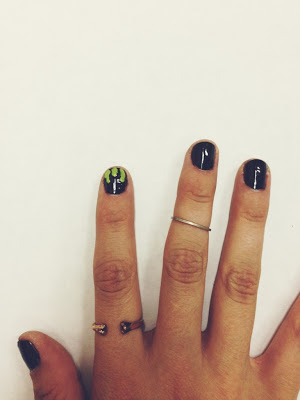
Finger Friday! D.I.Y Green Gooze


Halloween is leaving us so quickly! In fact this will be my last halloween nail tutorial.
This small nail project has been keeping me festive all month long, and i hope it has for
some of you as well. I thought I'd ask my boyfriend if he had any ideas to share with me
& yada yada yada I took it into consideration.

Supplies:

1. Black nail polish

2. Green nail polish

3. Toothpick or dotting tool

4. Top coat

Step one:
After painting your nails black (& making sure they are dry)

 you can then add 3 green dots. Make sure they are some what uneven. 
Step two: Begin working upwards, almost as if you are coloring
 in your nails and making sure you stay within the green dots
 you created in step one.

Step three: Make sure you fill in all the sides. Do steps 1-3 on each nail. & if you
want to give it a little bit more effect you can add a small green dot below the design. 


Step four: Add top coat to all your nails and your done!


Cheers!


Friday Fingers // D.I.Y eyeball nails


Staying in passing out candy this year? 
Dressing up as some kind of dead zombie?
Or just feeling festive? (That's me)

Then I think these'll do the trick. 

 Supplies:

1. Black nail polish
2. Red striper nail polish (veins)
3. Blue nail polish 
4. White nail polish 
5. Top coat
6. Dotting tool

Steps:
1. Paint it white.
2. Dot it blue with the wand of your blue polish.
3. Use your red striper brush and paint Y's around the eyeball.
4. Add a black dot in the center 
5. Add a white dot towards the top of the black to give the eye a glare.
6. Top coat it and your done!

Happy friday!
                                                         Follow my blog with Bloglovin


Related Posts Plugin for WordPress, Blogger...
Back to Top
Pin It button on image hover